Privacy becomes very popular nowadays.
People want to protect their private life and stay anonymous in many cases.
In some chats people would like to stay incognito or apply any other filters to their faces just for fun.
ConnectyCube SDK provides an interface to access video frames so then we can apply OpenCV filters/mask on it and have something like this in 1-1 chat:
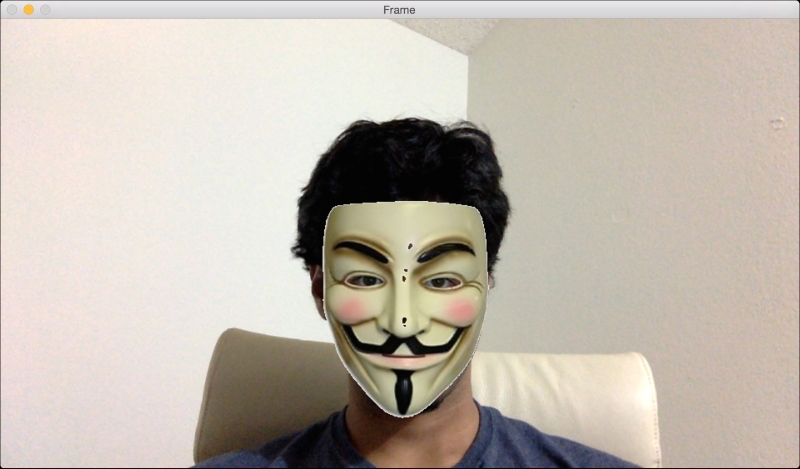
Putting mask on face
Wondering how it can be implemented?
Read on!
Android
The following things need to be done on Android platform
1. Connect OpenCV SDK
Import OpenCV Module into your Android project according to A Beginner’s Guide to Setting up OpenCV Android Library on Android Studio
2. In ConnectyCube SDK you need to implement a callback on recipient’s side to access video frames, so then we can apply any mask on it:
        videoTrack.addRenderer(new VideoSink() {
            @Override
            public void onFrame(VideoFrame videoFrame) {
                     // apply OpenCV code here
        // …

                     // render result on a view
      // RTCSurfaceView.onFrame(videoFrame);
            }
        });
More info on ConnectyCube VideoChat API is here.
3. Detect face and apply a mask on it with openCV as follows:
Mat putMask(Mat src, Point center, Size face_size){

//mask : masque chargé depuis l'image
Mat mask_resized = new Mat(); //masque resizé
src_roi = new Mat(); //ROI du visage croppé depuis la preview
roi_gray = new Mat();


Imgproc.resize(mask ,mask_resized,face_size);

// ROI selection
roi = new Rect((int) (center.x - face_size.width/2), (int) (center.y - face_size.height/2),(int) face_size.width, (int) face_size.height);
//Rect roi = new Rect(10, 10, (int) face_size.width, (int) face_size.height);

src.submat(roi).copyTo(src_roi);

Log.e(TAG, "MASK SRC1 :"+ src_roi.size());

// to make the white region transparent
Mat mask_grey = new Mat(); //greymask
roi_rgb = new Mat();
Imgproc.cvtColor(mask_resized,mask_grey, Imgproc.COLOR_BGRA2GRAY);
Imgproc.threshold(mask_grey,mask_grey,230,255, Imgproc.THRESH_BINARY_INV);

ArrayList maskChannels = new ArrayList<>(4);
ArrayList result_mask = new ArrayList<>(4);
result_mask.add(new Mat());
result_mask.add(new Mat());
result_mask.add(new Mat());
result_mask.add(new Mat());

Core.split(mask_resized, maskChannels);

Core.bitwise_and(maskChannels.get(0),mask_grey, result_mask.get(0));
Core.bitwise_and(maskChannels.get(1),mask_grey, result_mask.get(1));
Core.bitwise_and(maskChannels.get(2),mask_grey, result_mask.get(2));
Core.bitwise_and(maskChannels.get(3),mask_grey, result_mask.get(3));

Core.merge(result_mask, roi_gray);

Core.bitwise_not(mask_grey,mask_grey);

ArrayList srcChannels = new ArrayList<>(4);
Core.split(src_roi, srcChannels);
Core.bitwise_and(srcChannels.get(0),mask_grey, result_mask.get(0));
Core.bitwise_and(srcChannels.get(1),mask_grey, result_mask.get(1));
Core.bitwise_and(srcChannels.get(2),mask_grey, result_mask.get(2));
Core.bitwise_and(srcChannels.get(3),mask_grey, result_mask.get(3));

Core.merge(result_mask, roi_rgb);

Core.addWeighted(roi_gray,1, roi_rgb,1,0, roi_rgb);

roi_rgb.copyTo(new Mat(src,roi));

return src;}
Read more here.
Note:
All the above is implemented on a recipient’s side, so a sender has to notify the recipient that he/she enabled a mask on their side. You can set such notification via ConnectyCube System Messages API.
iOS
The same flow is applied to iOS – ConnectyCube iOS SDK also provides an access to video frames via CMSampleBufferRef.
1. Connect OpenCV SDK
Import OpenCV Module into your iOS project according to this guide.
2. Convert CMSampleBufferRef to cv::Mat: according to the suggestions here.
- (cv::Mat)matFromBuffer:(CMSampleBufferRef)buffer {
    CVImageBufferRef pixelBuffer = CMSampleBufferGetImageBuffer(buffer);
    CVPixelBufferLockBaseAddress( pixelBuffer, 0 );

    //Processing here
    int bufferWidth = (int)CVPixelBufferGetWidth(pixelBuffer);
    int bufferHeight = (int)CVPixelBufferGetHeight(pixelBuffer);
    unsigned char *pixel = (unsigned char *)CVPixelBufferGetBaseAddress(pixelBuffer);

    //put buffer in open cv, no memory copied
    cv::Mat mat = cv::Mat(bufferHeight,bufferWidth,CV_8UC4,pixel,CVPixelBufferGetBytesPerRow(pixelBuffer));

    //End processing
    CVPixelBufferUnlockBaseAddress( pixelBuffer, 0 );

    cv::Mat matGray;
    cvtColor(mat, matGray, CV_BGR2GRAY);

    return matGray;
}
3. Detect face with openCV according to this guide.
4. Apply a mask on face with OpenCV according to suggestions here.
Note:
All the above is implemented on a recipient’s side, so a sender has to notify the recipient that he/she enabled a mask on their side. You can set such notification via ConnectyCube System Messages API.
Good luck!
Have any questions or need help?
Feel free to contact us.